Mulching Vs Weeding: Which Saves Time And Boosts Yields
Mulching beats weeding for long-term weed control, moisture savings, and soil health.
If you want a garden that stays neat, drinks less water, and grows better with less effort, you need to understand mulching vs weeding. I’ve coached backyard growers, managed community plots, and restored tired beds for years. In this guide, I’ll break down mulching vs weeding with real results, field-tested tips, and clear steps you can use today.
Mulching vs Weeding: What They Are and How They Differ
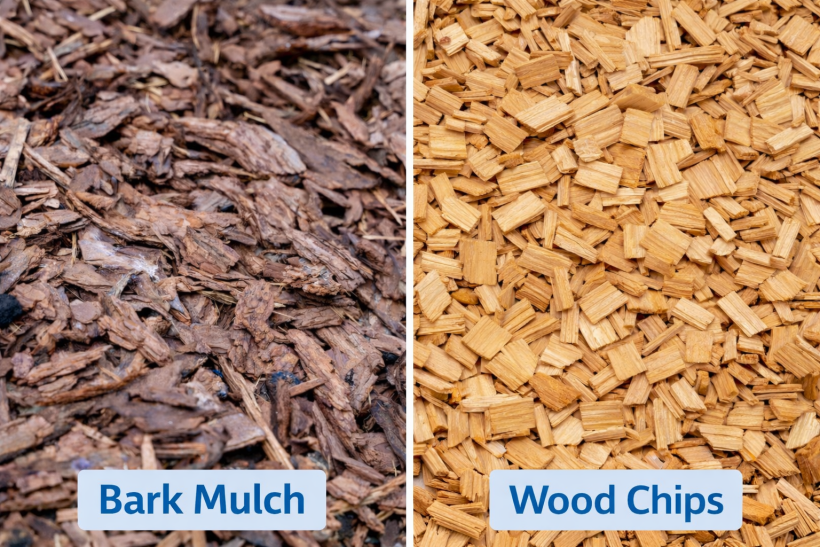
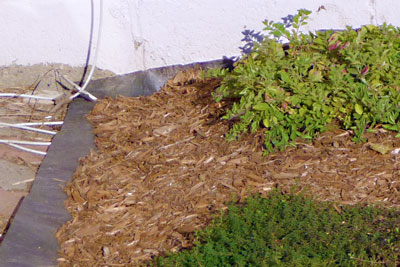
Mulching is the act of covering soil with a layer of material. The goal is to block light, reduce weeds, save moisture, and protect soil. Common mulches include wood chips, straw, leaves, compost, and fabric.
Weeding is the act of removing weeds from soil. You can pull by hand, cut with a hoe, or use tools. Some people use heat or cover to kill seedlings.
The main difference in mulching vs weeding is timing and pressure. Mulch prevents most weeds from starting. Weeding fixes the weeds that do show up. The best gardens use both in a smart plan.
How Weeds Grow and Why Mulch Works
Weeds need light and space. Many also wake up when soil is disturbed. When you dig, more seeds rise to the surface. They then sprout fast.
Mulch blocks light. A 2 to 4 inch layer can stop 60 to 90 percent of germination, based on extension trials. It also stops crusting and keeps soil damp. Roots then face less stress.
Weeding is still needed. Wind and birds drop seeds on top of mulch. Gaps happen. If you hoe or hand-pull in the top inch, you can stop most new weeds before they root deep.
Pros and Cons: Mulching vs Weeding
When you weigh mulching vs weeding, look at trade-offs. Think time, cost, soil life, and looks.
Benefits of mulch:
- Cuts weeds fast and keeps them low for months
- Holds moisture, often reducing water use by 25 to 50 percent
- Stabilizes soil temps and protects soil life
- Adds organic matter if you use natural mulch
- Gives beds a clean, finished look
Limits of mulch:
- Needs upfront work and materials
- Can hide pests like slugs in cool, damp spots
- Thick layers can tie up nitrogen if you mix chips into soil
- Some mulches can spread seeds if not clean
Benefits of weeding:
- Precise control around young crops
- Low material cost if you own simple tools
- Lets you inspect plants and catch issues early
- Good for tight rows or small beds
Limits of weeding:
- Takes steady labor in peak season
- Disturbs soil and can trigger more weeds
- Easy to fall behind after rain or vacation
- Can harm roots if done late or deep

Cost, Time, and Labor: What to Expect
In mulching vs weeding, cost shifts by scale and source.
- Mulch costs vary. Free leaves or grass clippings cost time to gather. Straw, chips, or compost cost per bale, yard, or bag. Delivery adds fees.
- Labor is front-loaded with mulch. One weekend can set you up for months.
- Weeding costs are spread out. Expect a little time each week in spring and summer.
- For large beds, mulch often wins on time by mid-season. For small beds, light weekly weeding may be faster.
From my field logs, a 200 square foot bed took me two hours to mulch in spring. I then weeded lightly every two weeks for 10 minutes. The same bed without mulch took 20 to 30 minutes of weeding each week in peak growth.

Materials and Tools That Make the Difference
Choosing the right gear tips the scale in mulching vs weeding.
Great mulch options:
- Straw or hay: Clean straw is best for veggies. Avoid hay with seeds.
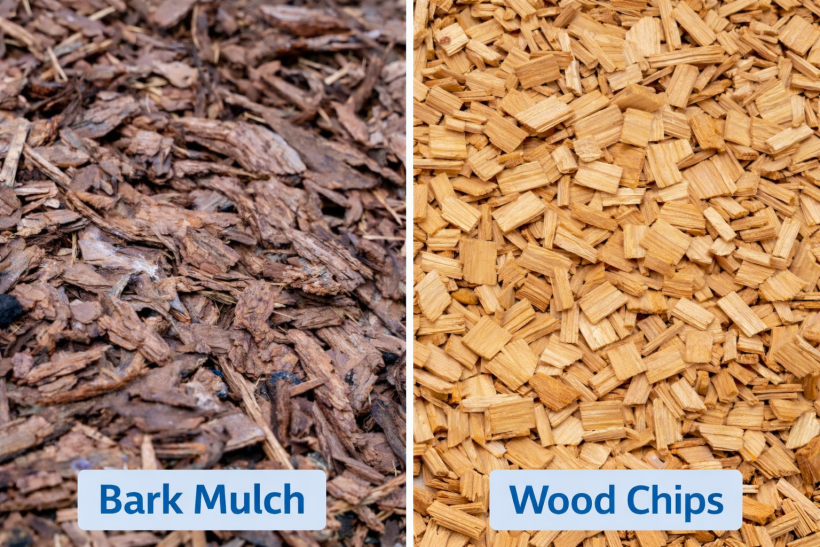
- Wood chips: Ideal for paths, trees, and shrubs. Keep chips on the surface.
- Shredded leaves: Free and rich in nutrients. Let them age a bit.
- Compost: Thin top-dressing feeds soil and smothers sprouts.
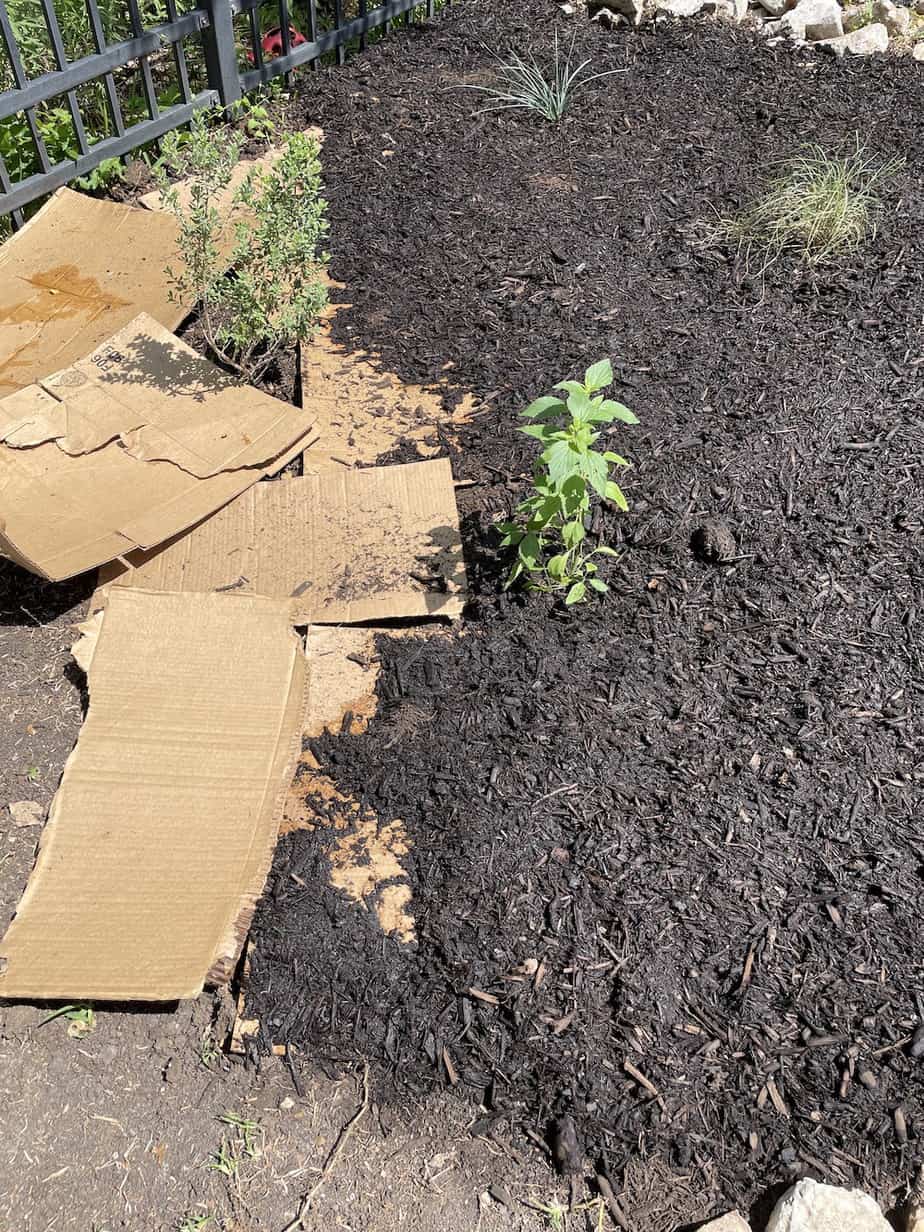
- Cardboard or paper: Base layer under chips for extra smothering.
- Landscape fabric: Works for paths or perennials. Top with chips for looks.
Weeding tools that save your back:
- Stirrup or oscillating hoe: Skims the surface and severs seedlings fast.
- Collinear hoe: Slides under mulch edges and tight rows.
- Hand weeder or hori-hori: Gets taproots like dandelions.
- Flame weeder: Useful before seeds sprout in paths or stale seedbeds.
- Hand rake: Pulls up tiny weeds after light rain.

Best Uses by Garden Type
Mulching vs weeding choices shift with your space.
Vegetable beds:
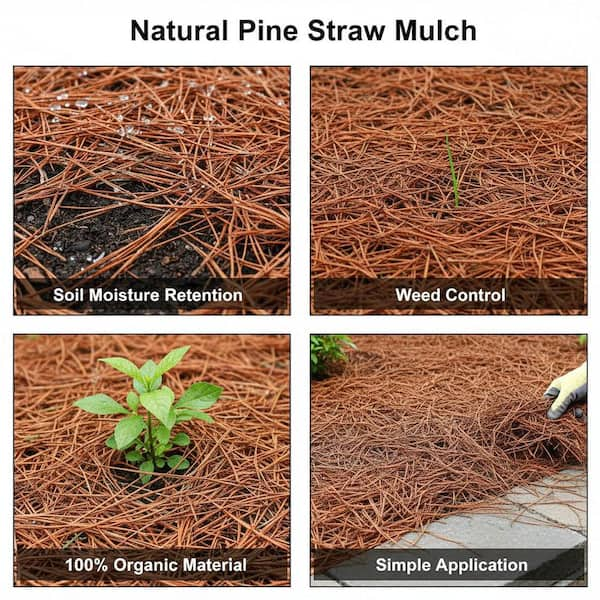
- Use straw, shredded leaves, or compost as mulch once soil warms.
- Weed with a stirrup hoe weekly until you mulch.
- Avoid thick wood chips in active veggie rows.
Perennial borders:
- Wood chips or shredded bark look clean and last longer.
- Hand-weed early spring, then top up mulch.
Fruit trees and shrubs:
- Wide mulch rings save water and stop mower blight.
- Check for voles in cold climates and pull mulch back from trunks.
Lawns and edges:
- Mulch tree rings and beds, not turf.
- Use a half-moon edger and hand-weed along borders.
Paths:
- Cardboard plus chips or fabric plus chips keep paths clear.
- Rake and top up as chips break down.
Climate and Season Playbook
Climate shapes mulching vs weeding strategy.
Cool, damp climates:
- Use airy mulches like straw to avoid slugs.
- Weed little and often to stay ahead after rain.
Hot, dry climates:
- Use thicker mulch to lock in water.
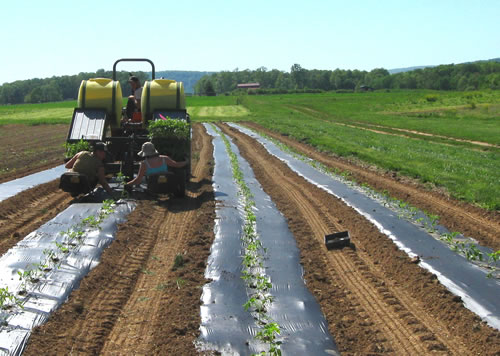
- Avoid dark plastic in full sun unless drip is under it.
Short seasons:
- Warm the soil first. Then mulch once seedlings are established.
- Use clear tarps early for pre-warming if needed, then switch to organic mulch.
Wet seasons:
- Keep mulch 2 to 3 inches, not 4, to reduce slug pressure.
- Clear weed growth fast with a hoe between storms.
Step-by-Step Plans You Can Follow
Mulching plan:
- Clean the bed. Smooth the surface and remove big weeds.
- Water deeply. Moist soil under mulch pays off.
- Lay a base if needed. Use cardboard where weeds are tough.
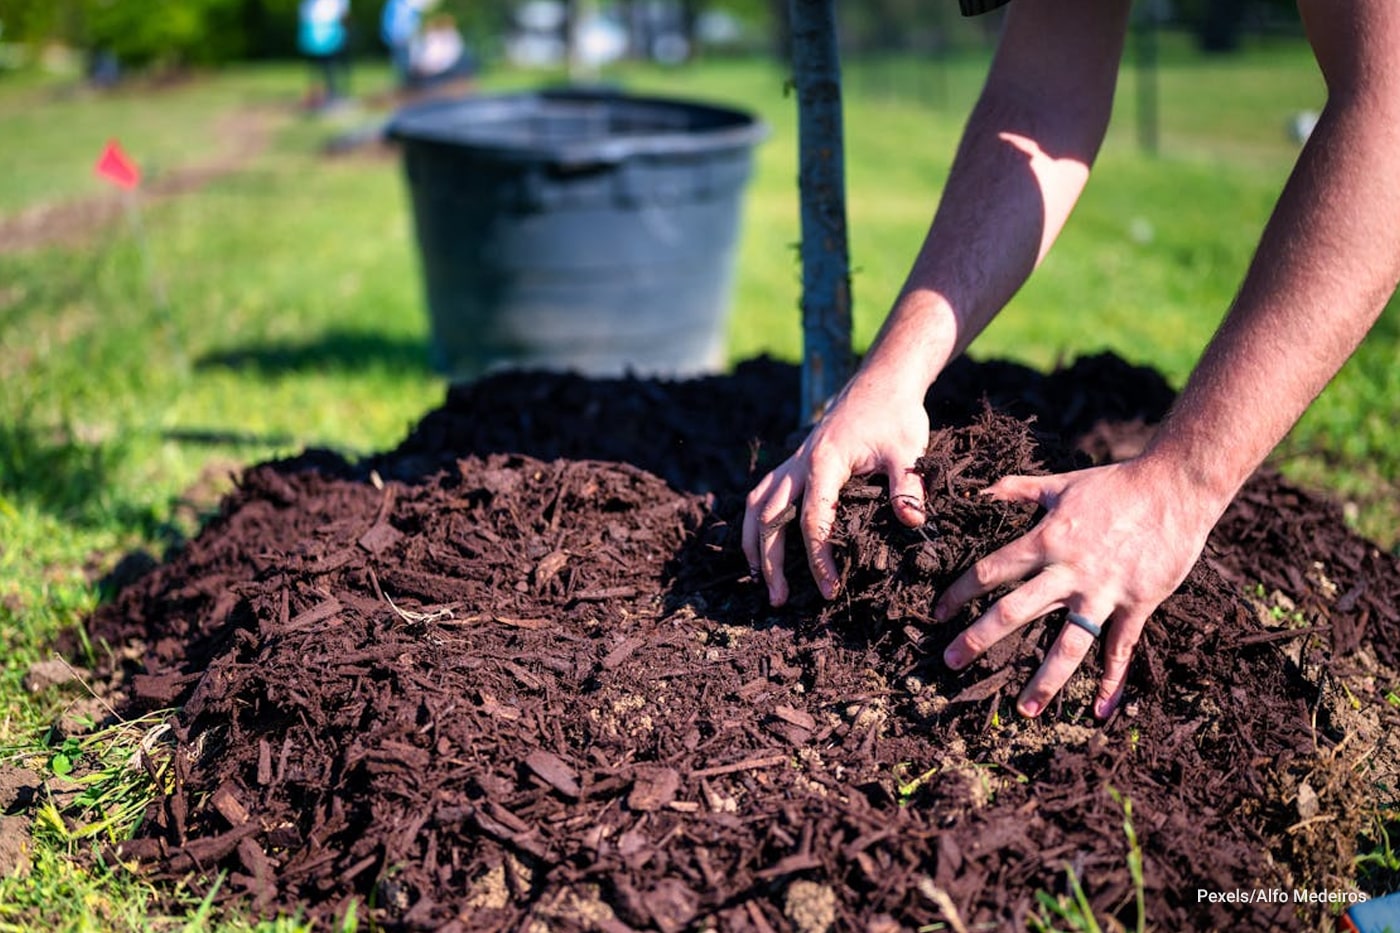
- Add mulch. Aim for 2 to 4 inches, even coverage.
- Pull back around stems. Keep a small ring clear to avoid rot.
- Spot-weed monthly. Yank anything that pops up on top.
Weeding plan:
- Set a schedule. A quick weekly pass beats a long monthly fight.
- Weed young. Seedlings die in seconds with a sharp hoe.
- Disturb shallow. Stay in the top inch to avoid new flushes.
- Mulch afterward. Lock in your gains with a thin layer.
- Remove seed heads. Do not let weeds set seed in your space.
Common Mistakes and How to Avoid Them
- Mulching too early in spring: Soil stays cold. Wait until it warms.
- Piling mulch against stems: Causes rot and pests. Leave a gap.
- Using hay with seeds: You add weeds. Buy clean straw or test a bale.
- Digging deep while weeding: Brings up more seeds. Skim instead.
- Skipping edges and paths: Weeds march in from borders. Mulch or fabric paths help.
Environmental Impact and Sustainability
In the mulching vs weeding debate, think about long-term soil care. Organic mulches feed microbes and store carbon over time. They reduce runoff and help pollinators by cooling soil.
Plastic mulches control weeds well but create waste. Use them with care and remove at season’s end. Fabric under paths lasts longer and reduces trash.
Hand weeding has a low footprint, but repeated tilling burns soil carbon. A no-till system with smart mulch and light weeding protects structure and life in the soil.
Real-Life Results: What Worked in My Beds
In a community plot with heavy clay, mulching vs weeding was not even close. A 3 inch layer of shredded leaves cut my weeding by two-thirds. Tomatoes held water longer and needed less drip.
In a herb bed, I tried no mulch and fast weekly weeding with a collinear hoe. That bed stayed clean too, but needed strict rhythm. When I skipped two weeks, lambsquarters took over. Lesson learned: either mulch or never skip your date with the hoe.
For new trees, wide wood chip rings stopped mower damage and held moisture. Growth jumped the next season. I still hand-weeded near trunks and checked for rodents in winter.
Decision Framework: When to Mulch, When to Weed, When to Do Both
Use this simple flow for mulching vs weeding choices.
- New bed with heavy weeds: Sheet mulch with cardboard plus chips or compost. Spot-weed monthly.
- Active veggie rows: Weed shallow until plants are 6 to 8 inches tall. Then mulch with straw or compost.
- Perennials and trees: Mulch now. Hand-weed near crowns as needed.
- Small patio pots: Hand-weed and top with compost or fine bark.
- Busy schedule: Mulch thick up front, then set a 10-minute weekly walk-through.
Frequently Asked Questions of mulching vs weeding
Is mulching better than weeding for most gardens?
Mulching prevents most weeds and saves water, so it wins for many beds. You still need light weeding to catch strays on top of mulch.
How thick should mulch be to stop weeds?
Aim for 2 to 4 inches of organic mulch. Thinner layers work for low-pressure beds, but thicker layers block more light.
Will mulch steal nitrogen from my plants?
If chips stay on top, the effect is small. Problems happen when wood chips get mixed into soil, so keep them at the surface.
Can I mulch right after planting seeds?
Wait until seedlings have a few true leaves. Then mulch around them without burying the stems.
What is the fastest way to weed without chemicals?
Hoe young weeds at the white-thread stage. Keep the blade sharp and skim just the top inch of soil.
Does landscape fabric replace weeding forever?
It reduces weeds a lot, but some still sprout on top. Top the fabric with chips and do light hand weeding.
Which mulch is best for vegetables?
Clean straw, shredded leaves, or compost work well. They keep soil cool, hold water, and break down into organic matter.
How often should I refresh mulch?
Top up once or twice a year as it breaks down. Keep the target depth to maintain weed control.
Will mulching increase slugs?
In cool, wet spots, slugs can hide in mulch. Use airy mulches, set traps, and keep stems clear to reduce issues.
Is hand weeding bad for soil?
Gentle, shallow weeding is fine. Deep, frequent tilling can harm structure, so use a light touch.
Conclusion
Mulching vs weeding is not an either-or choice. Mulch does the heavy lifting by blocking most weeds and saving water. Smart, shallow weeding keeps the few that slip through from taking hold.
Pick one bed this week and try the plan: clean, water, mulch 2 to 4 inches, then set a 10-minute weekly walk-through. Track your time and growth. If this guide helped, subscribe for more garden tips, or leave a comment with your results.