How To Build A Raised Garden Bed: Easy DIY Guide
Build a raised garden bed by choosing a sunny spot, framing it, filling it with rich soil, and planting smartly.
If you want a garden that drains well, warms up fast, and is easier on your back, learning how to build a raised garden bed is one of the best home projects you can tackle. I’ve found that a well-made raised bed can turn even a small yard, patio, or rough patch of ground into a productive growing space. In this guide, I’ll walk you through the full process with practical tips, common mistakes to avoid, and the kind of details that make the difference between a so-so bed and one that lasts for years.
Why build a raised garden bed?
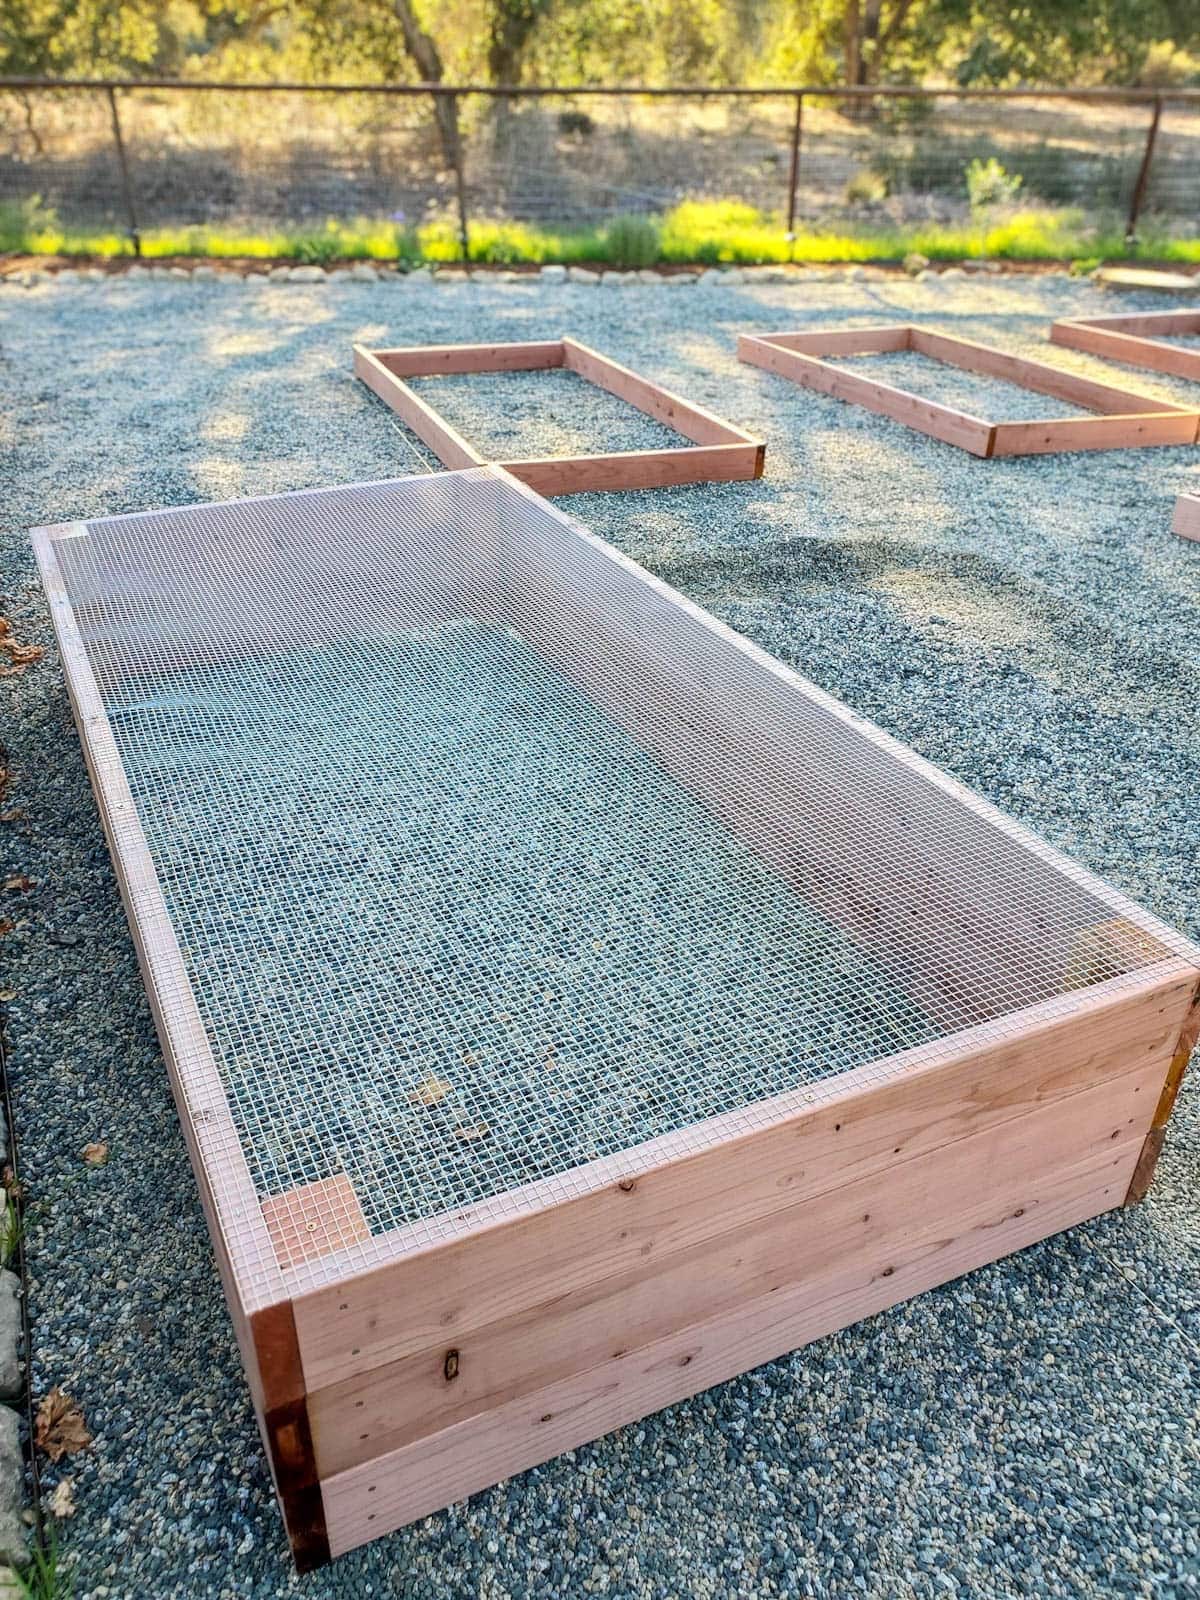
A raised garden bed is a garden that sits above ground level inside a framed box or border. It gives you more control over soil quality, moisture, and spacing, which is why so many home gardeners love it.
There are real benefits to building one:
- Better soil control: You can fill it with the exact mix your plants need.
- Improved drainage: Water moves through the bed more evenly.
- Less compaction: Roots grow more easily in loose soil.
- Easier maintenance: Weeding, planting, and harvesting feel much simpler.
- Longer growing season: Soil often warms faster in spring.
In my own experience, the biggest win is consistency. The first time I built a raised garden bed, I was surprised by how much healthier the plants looked compared with my in-ground plot. The difference came down to drainage and soil quality, not magic.
Planning your raised garden bed
Good planning saves time, money, and frustration. Before you buy lumber or fill a wheelbarrow, think through the location, size, and purpose of the bed.
Pick the right location
Choose a spot that gets at least 6 to 8 hours of direct sun each day for vegetables. If you’re growing leafy greens, a little afternoon shade can help in hot climates.
Also look for:
- Flat or gently sloped ground
- Easy access to water
- Space to walk around the bed
- Protection from strong wind if possible
Decide on the size
A good raised garden bed should be wide enough to reach the center without stepping inside. That usually means 3 to 4 feet wide.
Common sizes include:
- 4 feet by 8 feet for a classic garden bed
- 3 feet by 6 feet for smaller yards
- 2 feet by 4 feet for patios or tight spaces
Keep the height in mind too. A 10 to 12 inch bed works for many crops, while 18 to 24 inches is better if you want deeper roots or less bending.
Plan what you want to grow
The crops you choose affect the bed size and depth. For example:
- Lettuce, spinach, and herbs do fine in shallower beds
- Tomatoes, peppers, and cucumbers prefer deeper soil
- Root crops like carrots and beets need loose, deep soil
When I started, I planted tomatoes in a bed that was too shallow. The plants survived, but they never thrived the way I expected. Since then, I always match bed depth to root needs first.
Materials you need to build a raised garden bed
The best materials are sturdy, weather-resistant, and safe for growing food. Untreated cedar is a favorite because it resists rot naturally. Redwood also lasts well, but it can cost more.
Here’s a simple materials list:
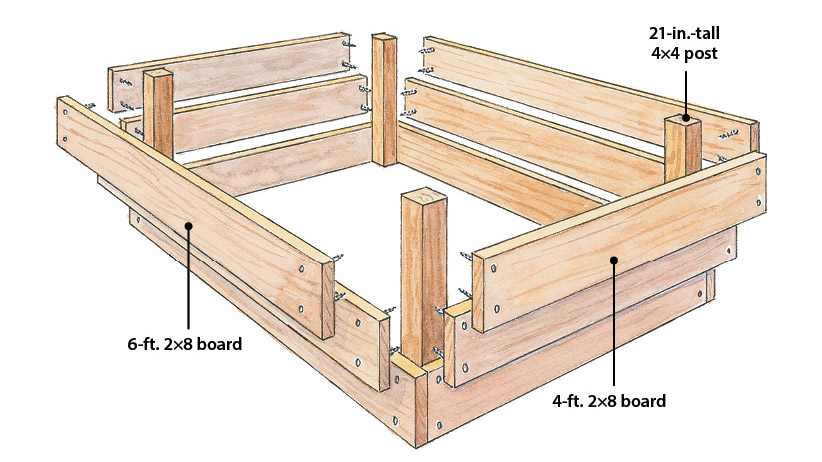
- Cedar, redwood, or rot-resistant boards
- 4 corner posts
- Exterior-grade screws or galvanized hardware
- Landscape fabric or cardboard
- Topsoil
- Compost
- Optional: sand, peat-free soil conditioner, or coconut coir
- Drill or impact driver
- Saw, if boards need cutting
- Measuring tape
- Level
- Shovel and rake
If you’re building a food garden, avoid wood that has been treated with harsh chemicals unless the product is specifically rated safe for garden use. That’s one of those small choices that matters a lot later.
How to build a raised garden bed step by step
This is the practical part. If you’ve been wondering how to build a raised garden bed without making it harder than it needs to be, the process is straightforward.
1. Mark the bed footprint
Measure the area and mark the corners with stakes or spray paint. Make sure the bed is square by checking that opposite corners are the same distance apart.
A simple method:
- Measure the length
- Measure the width
- Check diagonal corner-to-corner distances
- Adjust until both diagonals match
Taking time here keeps the bed from looking crooked later.
2. Prepare the ground
Clear away grass, weeds, rocks, and debris. If the ground is very uneven, level it as much as possible.
You have two common options for the bottom:
- Cardboard over grass or weeds, which helps block growth while breaking down over time
- Landscape fabric, which lasts longer but may limit soil contact
I usually prefer cardboard for home beds because it’s simple, cheap, and effective for the first season. Just overlap the pieces so weeds do not sneak through.
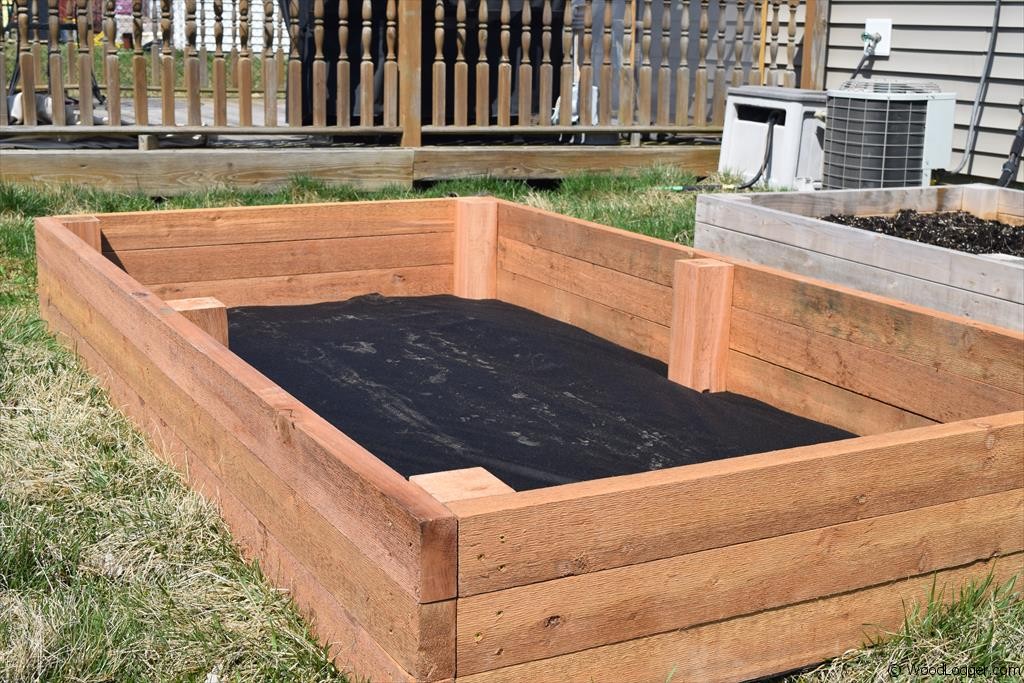
3. Cut and assemble the frame
Cut your boards to size if needed. Then screw the side boards into the corner posts to form a rectangle or square.
A few build tips:
- Pre-drill holes to reduce splitting
- Use galvanized screws for better rust resistance
- Check each corner with a square if you have one
- Keep the frame level as you work
If the bed is long, add a center support brace to prevent bowing over time. Soil is heavier than most people think, especially after a rain.
4. Set the frame in place
Move the completed frame to the chosen spot. Check the level front to back and side to side.
If one side is low:
- Remove a little soil under that side
- Add compacted soil or gravel under the frame
- Recheck the level before filling
A level bed helps with even watering and gives the whole garden a cleaner look.
5. Add a bottom barrier if needed
If you are placing the bed on grass, weeds, or poor soil, lay down cardboard or landscape fabric before adding soil. This helps suppress unwanted growth while still allowing water to drain.
Do not use plastic sheeting. It can trap water and create drainage problems.
6. Fill the bed with soil
This is where the bed starts to become a real garden. The ideal raised bed mix is loose, fertile, and full of organic matter.
A reliable blend is:
- 40% topsoil
- 40% compost
- 20% other organic material or aeration mix
You can adjust the mix based on what’s available in your area. The goal is a soil that holds moisture without turning muddy.
In my experience, this is the step where many new gardeners try to save money and regret it later. Cheap fill soil can be rocky, lifeless, or full of clay. Good soil pays you back every week.
7. Water the soil and let it settle
After filling, water the bed deeply. The soil will settle, and you may need to top it off again.
This matters because fresh soil often looks full at first, then sinks after a few watering cycles. I usually fill the bed a little higher than the final line, knowing it will compact naturally.
8. Plant your garden
Now the fun part begins. Plant according to season, spacing, and sun needs.
For best results:
- Put tall crops like tomatoes on the north side if possible
- Keep spacing labels or tags handy
- Group plants with similar water needs
- Mulch the surface to hold moisture
If you are new to raised bed gardening, start with easy crops like lettuce, basil, radishes, bush beans, or cherry tomatoes.

Best soil for a raised garden bed
Soil quality is the heart of a raised bed. A strong frame means little if the soil is poor.
A healthy raised bed soil should:
- Drain well
- Hold moisture
- Support roots
- Feed plants through the season
A simple homemade mix often works better than one expensive bag of “garden soil.” Compost adds nutrients and life. Topsoil provides structure. Lightweight organic material helps the soil stay fluffy.
Some gardeners also add:
- Worm castings for a nutrient boost
- Perlite or pumice for drainage
- A slow-release organic fertilizer at planting time
Avoid filling the whole bed with straight compost. It can shrink too much, hold too much water, or create nutrient issues. Balance is the key.
Common mistakes to avoid
I’ve made a few of these myself, so I can say this with confidence: small mistakes can cause big headaches later.
Watch out for these problems:
- Building the bed too wide, which makes reaching the center hard
- Using untreated wood that rots too quickly
- Skipping ground prep and ending up with weeds
- Filling the bed with low-quality soil
- Forgetting drainage
- Crowding plants too closely
- Placing the bed in too much shade
One of the most common errors is assuming any soil will do. Raised beds are forgiving, but they are not foolproof. Start with the right foundation, and the garden becomes much easier to manage.
Cost, durability, and material choices
The cost of building a raised garden bed can vary a lot depending on size and materials. A small DIY bed may cost very little if you already have tools and some supplies. Larger cedar beds cost more but usually last longer.
Here’s a simple comparison:
- Pine: cheaper, but shorter lifespan
- Cedar: pricier, naturally rot-resistant
- Redwood: durable and attractive, but often expensive
- Composite boards: long-lasting, but may cost more upfront
For durability, thicker boards and strong corner posts usually help the bed last longer. If you live in a wet climate, choose rot-resistant wood and keep the base well drained.
Seasonal care and maintenance
A raised garden bed is easy to maintain, but it still needs regular care. Soil settles and nutrients get used up over time.
Keep your bed healthy by:
- Adding compost once or twice a year
- Mulching to reduce water loss
- Pulling weeds early
- Checking for pests weekly
- Refreshing soil as needed
In hot weather, raised beds dry out faster than in-ground gardens. That’s one reason drip irrigation or a soaker hose can be such a smart upgrade. I learned that lesson after losing a row of lettuce to a few scorching afternoons.
Frequently Asked Questions about how to build a raised garden bed
How deep should a raised garden bed be?
Most raised garden beds are 10 to 12 inches deep, which works for many vegetables and herbs. If you want to grow root crops or reduce bending, 18 to 24 inches is often better.
What is the best wood for a raised garden bed?
Cedar is one of the best choices because it naturally resists rot and lasts a long time. Redwood is also a strong option, though it can be more expensive.
Do I need to put anything under a raised garden bed?
If the bed sits on grass or weeds, cardboard or landscape fabric helps block growth at the bottom. Avoid plastic, since it can cause drainage problems and trap water.
Can I fill a raised garden bed with just compost?
It is better not to use only compost. A balanced mix of topsoil, compost, and organic material gives better structure, drainage, and long-term plant health.
How long does a raised garden bed last?
That depends on the material and climate. Untreated pine may last only a few years, while cedar or redwood can last much longer with proper care.
What vegetables grow best in a raised garden bed?
Leafy greens, herbs, tomatoes, peppers, beans, carrots, and radishes all do well in raised beds. The best choice depends on how much sun, depth, and water your bed gets.
Conclusion
Learning how to build a raised garden bed is really about setting your plants up for success. When you choose the right site, use solid materials, and fill the bed with healthy soil, you create a garden that is easier to manage and more rewarding to grow.
Start small if you need to. A single well-built bed can teach you a lot and still give you fresh herbs, vegetables, and a real sense of progress. If this guide helped you, take the next step and build your bed this weekend, then keep learning as your garden grows.